Next.js + NextAuth.js: Adding Authentication
Published on Tuesday, Apr 30, 2024
Maybe you want to add authentication to your existing project or wanna learn how to add. Let's go!
Create Project
Let's get started quickly. First, create a new project.
yarn create next-app
Customize as any option you wish, I'm going src directory, app router and typescript.
Install NextAuth.js
Fire up the terminal in your project and...
yarn add next-auth
Coding
Clean up
Optional step.
If you wish, clean up all useless code like in:
src/app/globals.css- useless default stylessrc/app/Page.tsx- useless boilperate
And maybe delete the other useless files. Feel free to do it as you wish.
Create API Route
In your project, create a file at src/app/api/auth/[...nextauth]/route.ts or apportiate with your settings: JavaScript/TypeScript, Page/App Router, src directory.
Add this code there:
import NextAuth, { NextAuthOptions } from "next-auth";

// Providers
import GithubProvider from "next-auth/providers/github";

const authOptions: NextAuthOptions = {
  secret: process.env.NEXTAUTH_SECRET,

  providers: [
    // Providers Config
    GithubProvider({
      clientId: process.env.GITHUB_CLIENT_ID,
      clientSecret: process.env.GITHUB_CLIENT_SECRET,
    }),
  ],
};

const handler = NextAuth(authOptions);

export { handler as GET, handler as POST };
Here's a breakdown of NextAuthOptions:
secret: this is used to encrypt the session data stored on the client. Its like you got a ZIP on your client-side but not its password
providers: array of providers
Provider: requires a client ID & secret. Import before use. Each requires client ID and secret but some may differ.
Creating GitHub App
Let's begin by creating a github app. Visit here and fill out the form.
Application name: required, you decide. "My Next Auth App"
Homepage URL: required, your home page. On local, your localhost:port (my: http://localhost:3000)
Authorization callback URL: home page URL + "/api/auth/callback/<provider>". As we are making github app, "/api/auth/callback/github".
Then register application.

The Client ID is instantly shown, and click Generae a new client secret to get secret.
Client ID: 57c20cd6e30029d8a56c
Client Secret: XXXXXXXXXXXXXXXXX
Store the environment variables
Make a .env file in your project and...
GITHUB_CLIENT_ID=?
GITHUB_CLIENT_SECRET=?
NEXTAUTH_SECRET=anything_very_long_and_secure_dont_leak
Change ? with your actual ID and Secret.
Adding auth
Now, let's start our development server:
yarn dev
And also, change src/app/page.tsx to like:
export default function Home() {
  return (
    <main className="p-8 text-3xl">
      NextAuth.js Demo
    </main>
  );
}
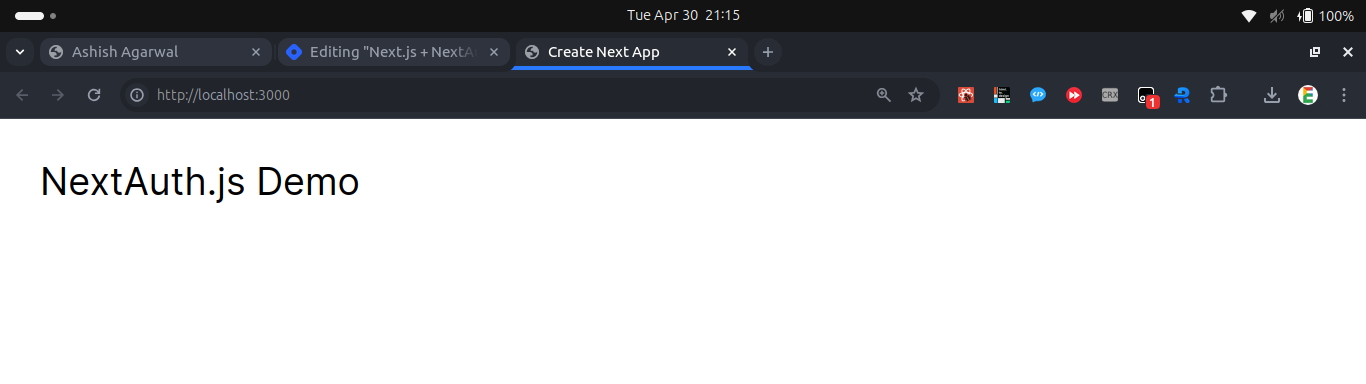
You may see something like this
Good. Let's add a login button.
"use client";
// Authentication can be added only on client side

// Import Login Button
import { signIn } from "next-auth/react";

export default function Home() {
  return (
    <main className="p-8 text-3xl">
      NextAuth.js Demo
      {/* Login Button */}
      <button
        onClick={() => signIn("github")}
        className="block bg-gray-900 border-0 focus:outline-0 p-4 rounded text-white hover:ring active:ring-slate-400"
      >Sign in with GitHub</button>
    </main>
  );
}
From the code, observe that: authentication can only be done on the client side (probably, because of handling events).
The function signIn(provider: string) can be used to call or take client to the signIn page. Now see on the results:

Click Sign in with GitHub

Note: nextauth.js by default always asks these permissions like email and profile information, read-only and limited. You are not allowed to remove any permission or add another one. You may make your own authentication to change the permissions.
Authorize your own app and continue.

What we forgot is, we have to show the user their session info when they are authenticated. Let me tell you how to do it!
Note: to use nextauth.js's session, you need to cover the component that uses authentication with a <SessionProvider> import from
nextauth/react. You may do it like this:page.tsx:
"use client";

import { SessionProvider } from "next-auth/react";
import { Main } from "./components/Main";

export default function Home() {
  return (
    <SessionProvider>
      <Main />
    </SessionProvider>
  );
}
And
./components/Main.tsxwill be the component that access the session:
"use client";

import { signIn, useSession } from "next-auth/react";

export const Main = () => {
  const session = useSession();

  return (
    <main className="p-8 text-3xl">
      NextAuth.js Demo
      {/* Login Button */}
      <button
        onClick={() => signIn("github")}
        className="block bg-gray-900 border-0 focus:outline-0 p-4 rounded text-white hover:opacity-90 active:ring-slate-400"
      >
        Sign in with GitHub
      </button>
      {JSON.stringify(session)}
    </main>
  );
}
Now, authenticate with your github account, and you may see something such:

It's actually like:
{
  "data": {
    "user": {
      "name": "Ashish Agarwal",
      "email": "code.with.aasheesh@gmail.com",
      "image": "https://avatars.githubusercontent.com/u/83082760?v=4"
    },
    "expires": "2024-05-30T16:09:02.426Z"
  },
  "status": "authenticated"
}
data: the main data
data.user: the user's actual data you may need. name, email, image.
data.expires: automatic expiry time if you do not open the page till the given time
data.status: "authenticated" if logged in and "unauthenticated" if not logged in
Using data.status, we can know if you are authenticated or no. Let's do it and show a logout button instead of login then.
"use client";

import { signIn, signOut, useSession } from "next-auth/react";

export const Main = () => {
  const session = useSession();

  return (
    <main className="p-8 text-3xl">
      NextAuth.js Demo
      {/* Login Button */}

      {/* Conditional rendering on the basis of whether authenticated or not */}
      {session.status === "authenticated" ? (
        <div>
          {/* User is authenticated */}
          <p className="my-4">Signed in as {session.data.user.email}</p>
          <button
            onClick={() => signOut()}
            className="block bg-red-900 border-0 focus:outline-0 p-4 rounded text-white hover:opacity-90 active:ring-red-400"
          >
            Sign out
          </button>
        </div>
      ) : (
        <div>
            {/* User is not authenticated */}
            <p className="my-4">Not authenticated</p>
          <button
            onClick={() => signIn("github")}
            className="block bg-gray-900 border-0 focus:outline-0 p-4 rounded text-white hover:opacity-90 active:ring-slate-400"
          >
            Sign in with GitHub
          </button>
        </div>
      )}
    </main>
  );
}
Observe the code and see how easy it is. I also added comments to documenate the code.
When not authenticated:

Login with your account. And,

Great work. Now we conditionally show different content on authenticated and if you are not.
Conculsion
I hope you learned nextauth.js from this tutorial well. If you have time, I recommend you to continue by:
reading the next post of my blog
adding more authentication providers (know them here)
use user's name, image and email together to simplify creating accounts on your website
make a guestbook
Thank you for having a read to the end! Anyways, not the end. Check out my portfolio here!