How to create a Next.js App
Published on Saturday, Apr 27, 2024
Before learning something, you may need to know how to get started. I'll be teaching you React and Next.js.
To get started with Next.js, I'll guide you how you can create a new next.js project from scratch.
Prerequestites
You need to have installed:
- Node & NPM: Learn here (not my video)
Additionally, I will guide you using the npm package manager. However, I will also give you the exact same commands for the yarn and pnpm package managers as you may prefer.
Bonus Tip
If you have already knowledge of HTML, CSS and JavaScript, then you may easily catch up with Next.js (or React, Next.js is a react framework). I recommend you to have this so you won't confuse.
Let's continue quick!
Creating a project
Firstly, open any place on your computer (let me go desktop).
Open a terminal
On Windows, right-click the folder or the desktop and choose
Open in Terminal. If it is not available, pressCtrl+R, typecmd.exe, then hitEnterOn Linux/Mac, right-click the folder or the desktop, choose
Open in Terminal
Create a project
Run any of the following command dependent on your package manager.
If you are not sure which package manager to use, then you may prefer npm .
# Node Package Manager (NPM)
npm create next-app

# Yarn
yarn create next-app

# Performant Node Package Manager (PNPM)
pnpm create next-app
Pro tip: almost any
npmpackage manager's command is literally same works inpnpmby just addingpto the beggining. PNPM is a unofficial but faster recreation of the official Node Package Manager.
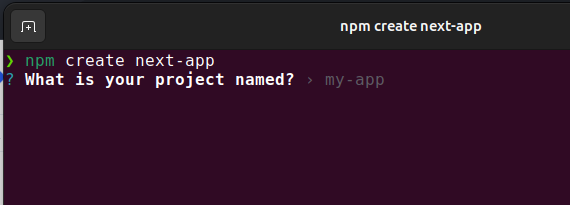
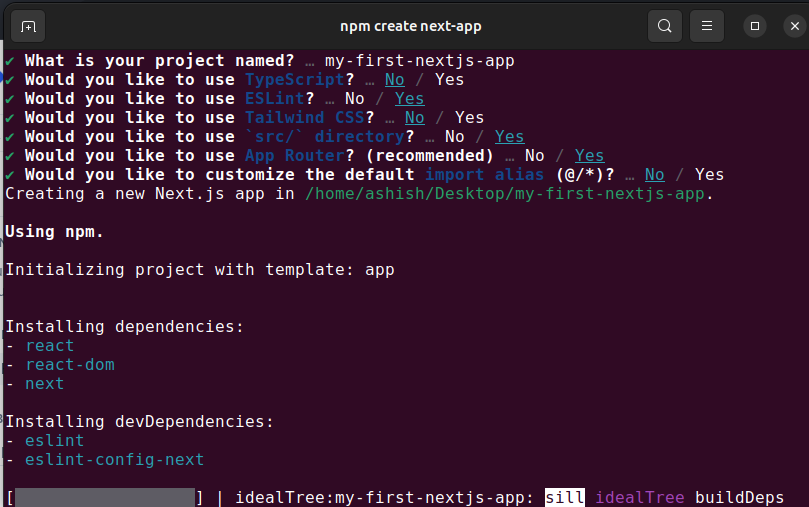
I'll choose npm create next-app. Let me see what happens!
If you see "installing dependencies", just wait for it to complete. It is only one time process. It may ask you
continue installation?, so pressyat the time.
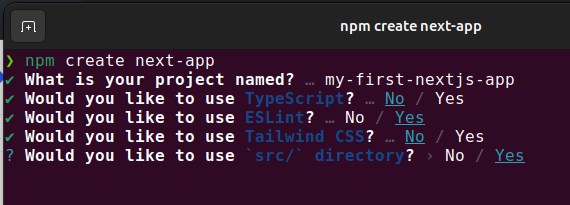
It is asking us a project name. By default, if you hit enter, it will be default as my-app.
Let's choose my-first-nextjs-app.
Config

It will ask you Would you like to use TypeScript?. It depends on you. You can continue as No as it is default.
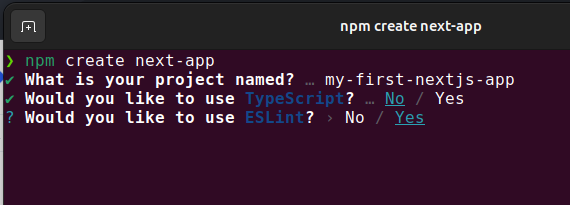
Would you use ESLint? By default, it is Yes and it is used to automatically identify issues in your code. Let's go with yes.
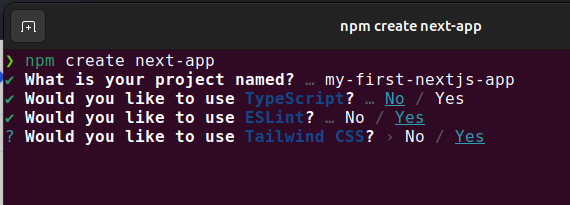
Tailwind CSS is a CSS framework for designing nice layouts and websites. >40% of websites use Tailwind CSS (with all different frameworks: React, Next.js, Astro, Remix, Svelte, theres a long list).
You can choose Yes to install tailwind CSS automatically. If you choose no, it is not a issue as it can be added to your project later. Let's go as No.
You can choose if you wish to use the src/ directory or not.
It's just a preference. If you wish to put your folders like for config, app, lib etc on your project's root or you wish to move it to src/app, src/config, src/lib, etc. Let's choose yes.
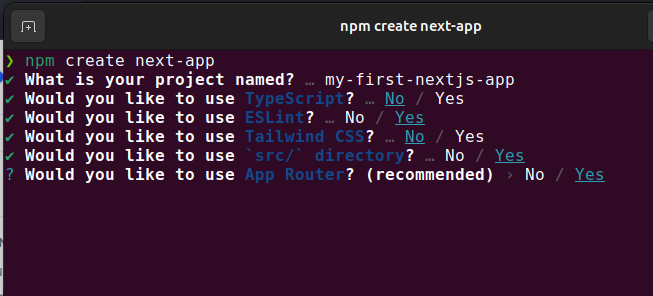
Next.js has 2 kind of routers: App Router and Pages Router. You can choose app router as it is asking (recommended), but if you choose no then you get pages router.
Pages router's files will go like
pages/and app router's files go atapp/. Note that the same code that works on app router may not work on pages router as they are quite different.
Let's choose Yes.
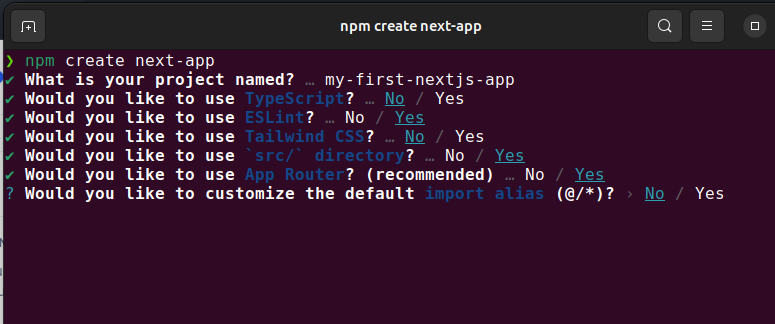
Most peoples, includng me, do not want to customize the default import alias. Let's choose No.
Installing
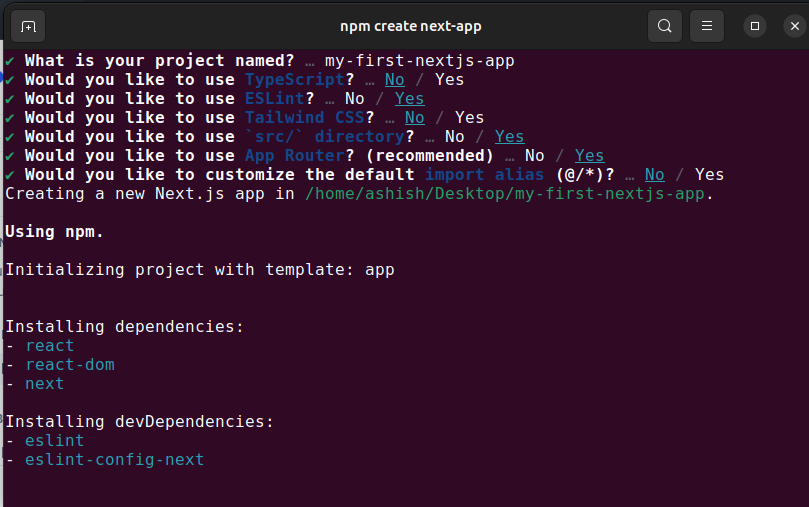
Now the project is installing. Just wait a minute with your WiFi!
Project has been created
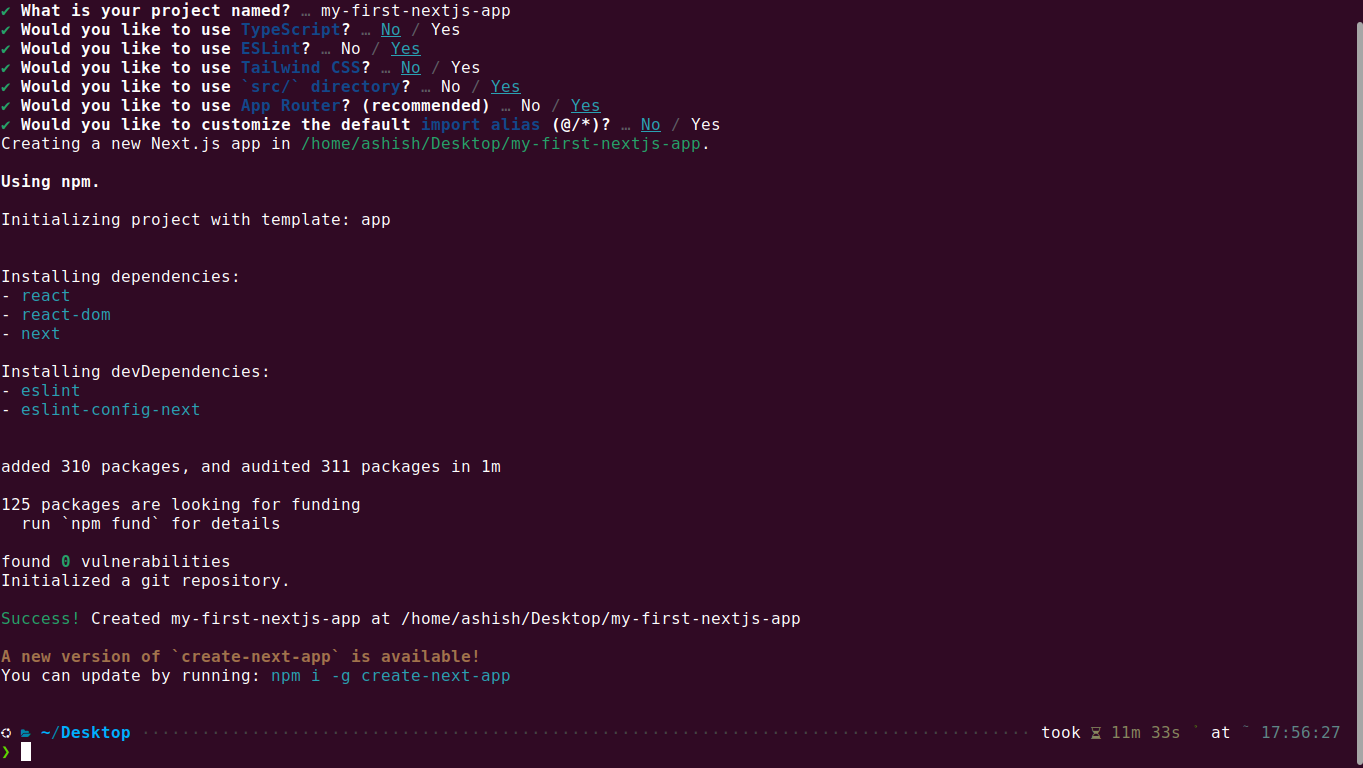
Look, it's saying Success! Created my-first-nextjs-app....
Now as you've made your first next.js app, do these commands to continue:
# Change working directory to the new project
cd ./my-first-nextjs-app/

# Start development server
# Node Package Manager (NPM)
npm run dev

# Yarn
yarn dev

# Performant Node Package Manager (PNPM)
pnpm run dev
Starting the development server
When you start the development server, your terminal will show something like this:
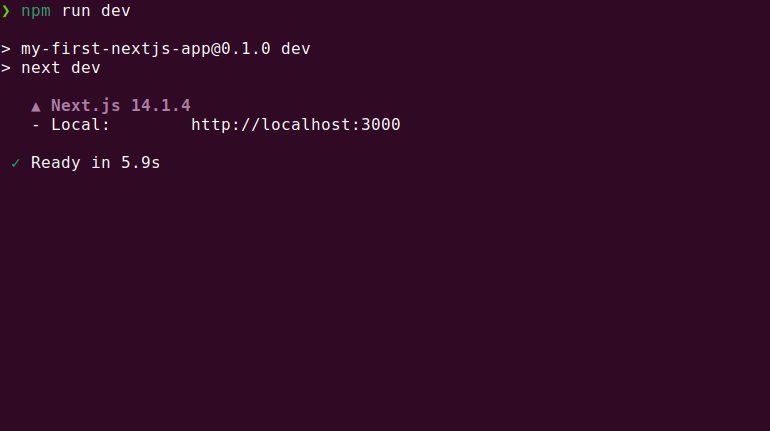
It will show you the local server URL (that is, http://localhost:3000). Click and visit it!
When you will be visting it, you will see something like Compiling, it says that its building the route. Once it says Compiled, then you can see the page.
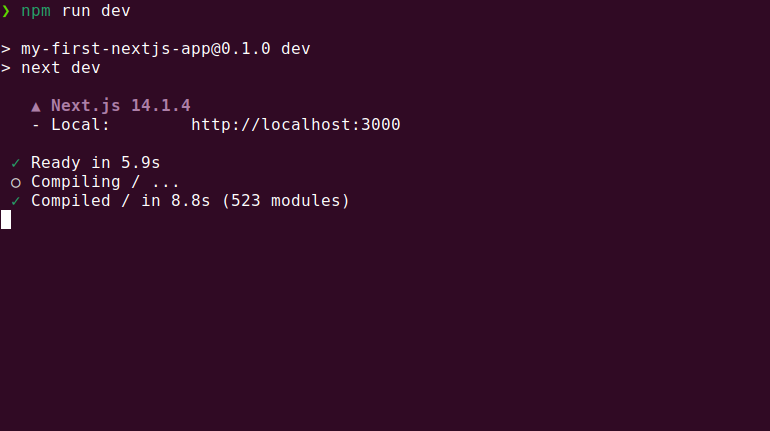
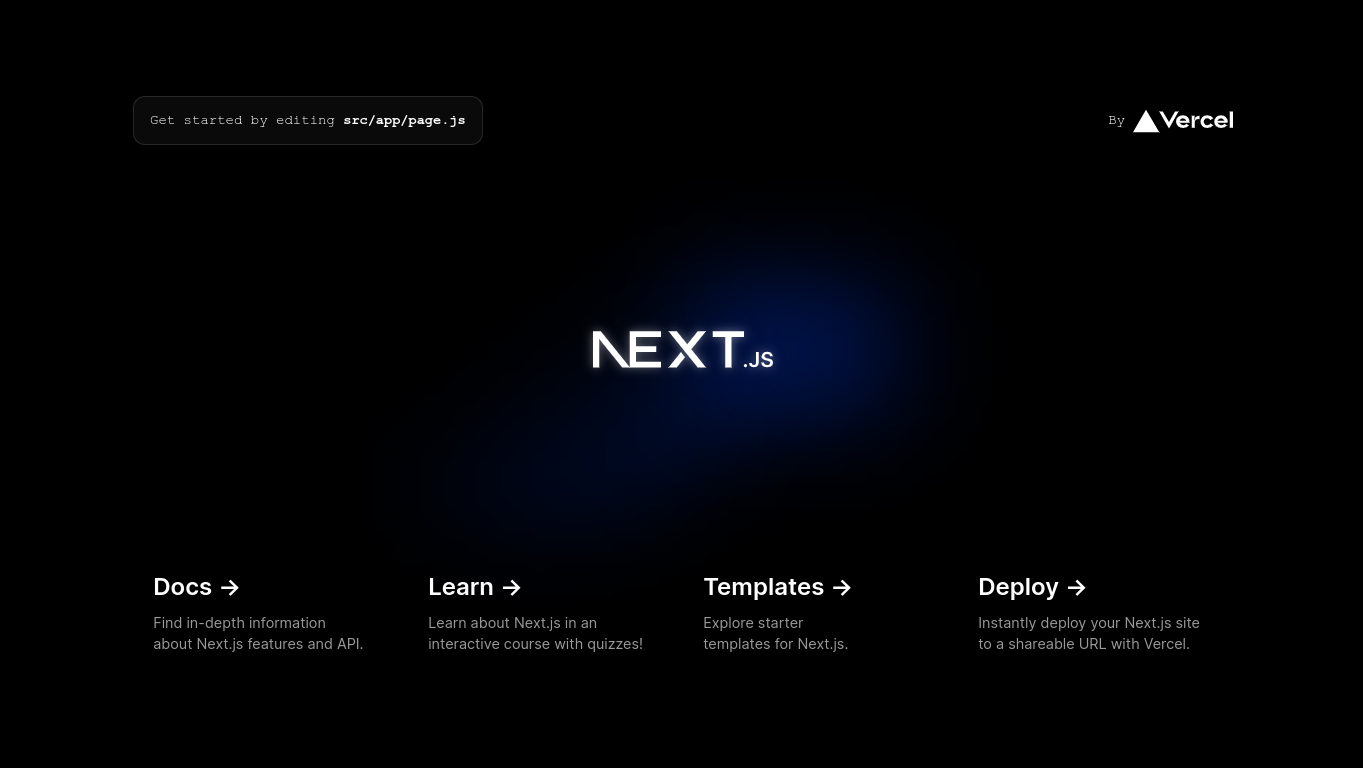
Now as you can see, our / route has been built and is now visible! Let's go and it looks amazing.
Next steps
As you've learned how to create a next.js app, here are the next steps:
Learn more about next.js on the official documentation
Learn the differences of app router and pages router
Meet ya back later, byeee!